UART Basics: Getting a shell via UART (Netgear WNR1000v3)

Overview
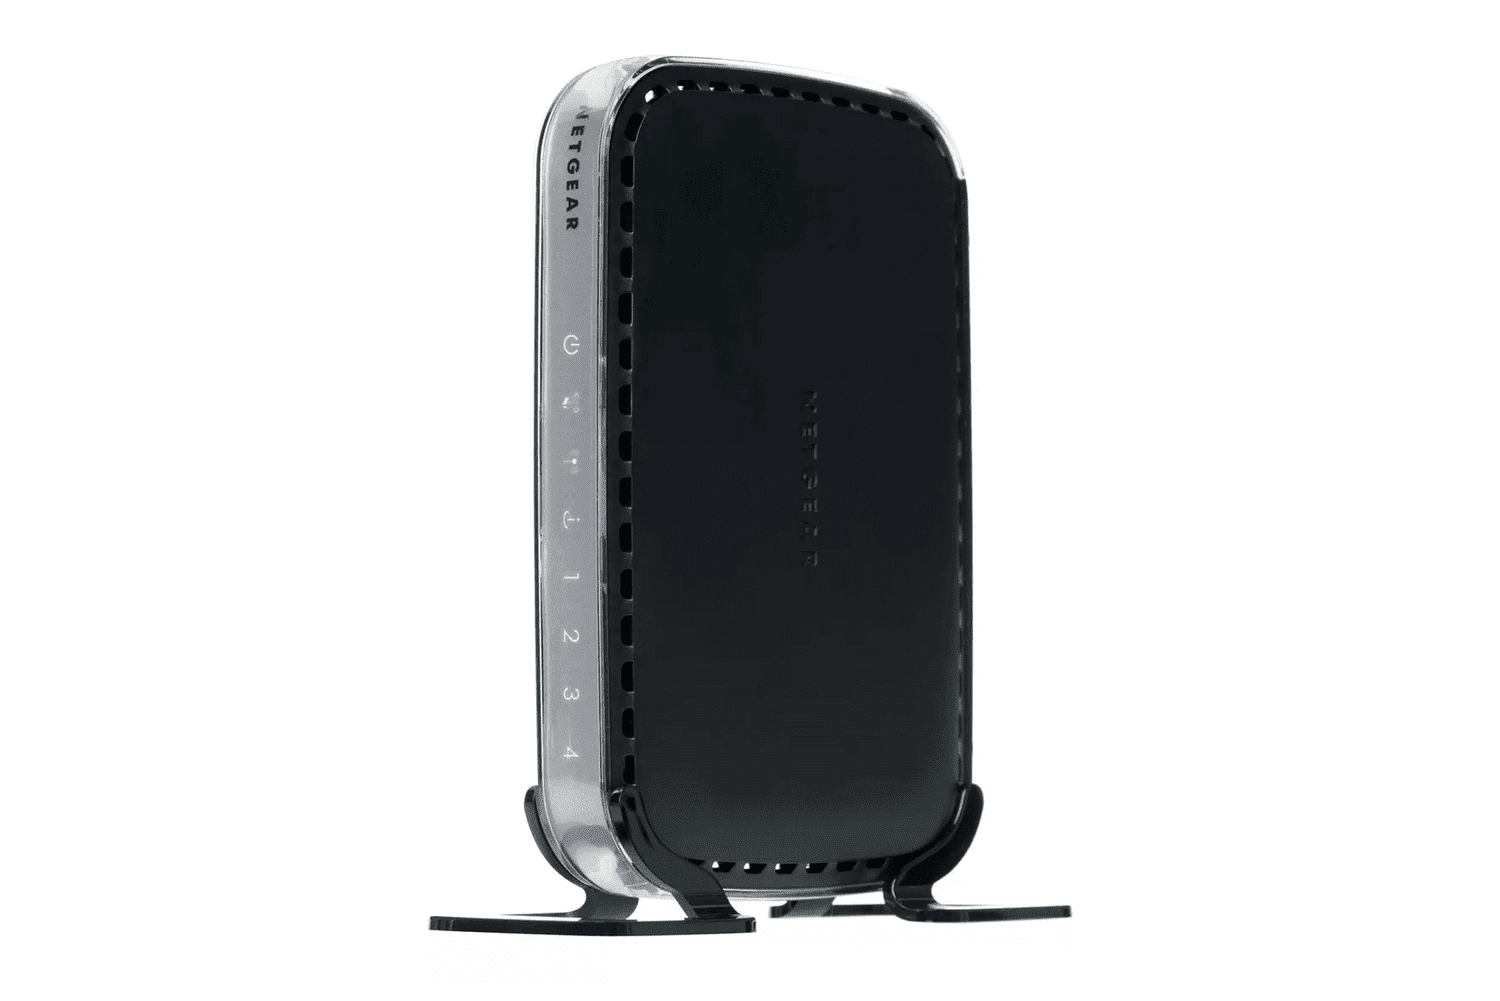
Ever wonder what’s under the hood of many of your IoT devices? It’s probably some form of Linux! In this article, I will show you how to get a shell within a router using a Bus Pirate and a UART connection. For this demonstration, I will be using the Netgear WNR1000v3.
Disclaimer - If done improperly, it is VERY easy to brick your device. Connecting over UART can also void your warranty.

Getting Started
To get started, you will need a way to communicate over UART. There are several ways of doing this, but I will be using the Bus Pirate from Dangerous Prototypes:
“The Bus Pirate is an open source hacker multi-tool that talks to electronic stuff. It’s got a bunch of features an intrepid hacker might need to prototype their next project” - http://dangerousprototypes.com/docs/Bus_Pirate
You can pick one up from SparkFun for around $32: https://www.sparkfun.com/products/12942
Overview of the board

Front
On the front of the board, we can see:
- Broadcom BCM5356A1 CPU
- SDRAM
- 6 Pin header for our UART Connection

Back
On the back of the board we can see:
- Macronix MX25L3205DM2I-12G (Flash Chip)
UART Connection
UART has three components that allow it to communicate:
TX (Transmit)
Is responsible for transmitting the data and is connected to the RX pin.
RX (Receive)
Is responsible for Receiving the data and is connected to the TX pin.
GND (Ground)
Provides a common reference voltage level for both the transmitting and receiving devices.
Sometimes, we have to figure out where each of these pins are located within the header, but thankfully OPENWRT has done this for us:
“Attach 3,3V Serial UART Adapter to J3 on the PCB. Pin 6=GND, Pin 2=RXD, Pin 5=TXD. J3 Connector is not soldered in by default. Standard UART speed 115200 Baud. “ - https://openwrt.org/toh/netgear/wnr1000_v3
We can see this below:

To connect our Bus Pirate, as mentioned earlier, we have to remember that the TX (Transmit) is connected to the RX (Receive), as shown below:

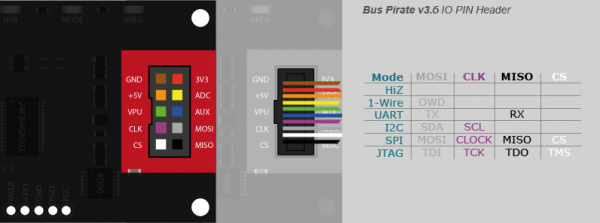
To make these connections for your Bus Pirate, you can follow this diagram provided by Sparkfun:

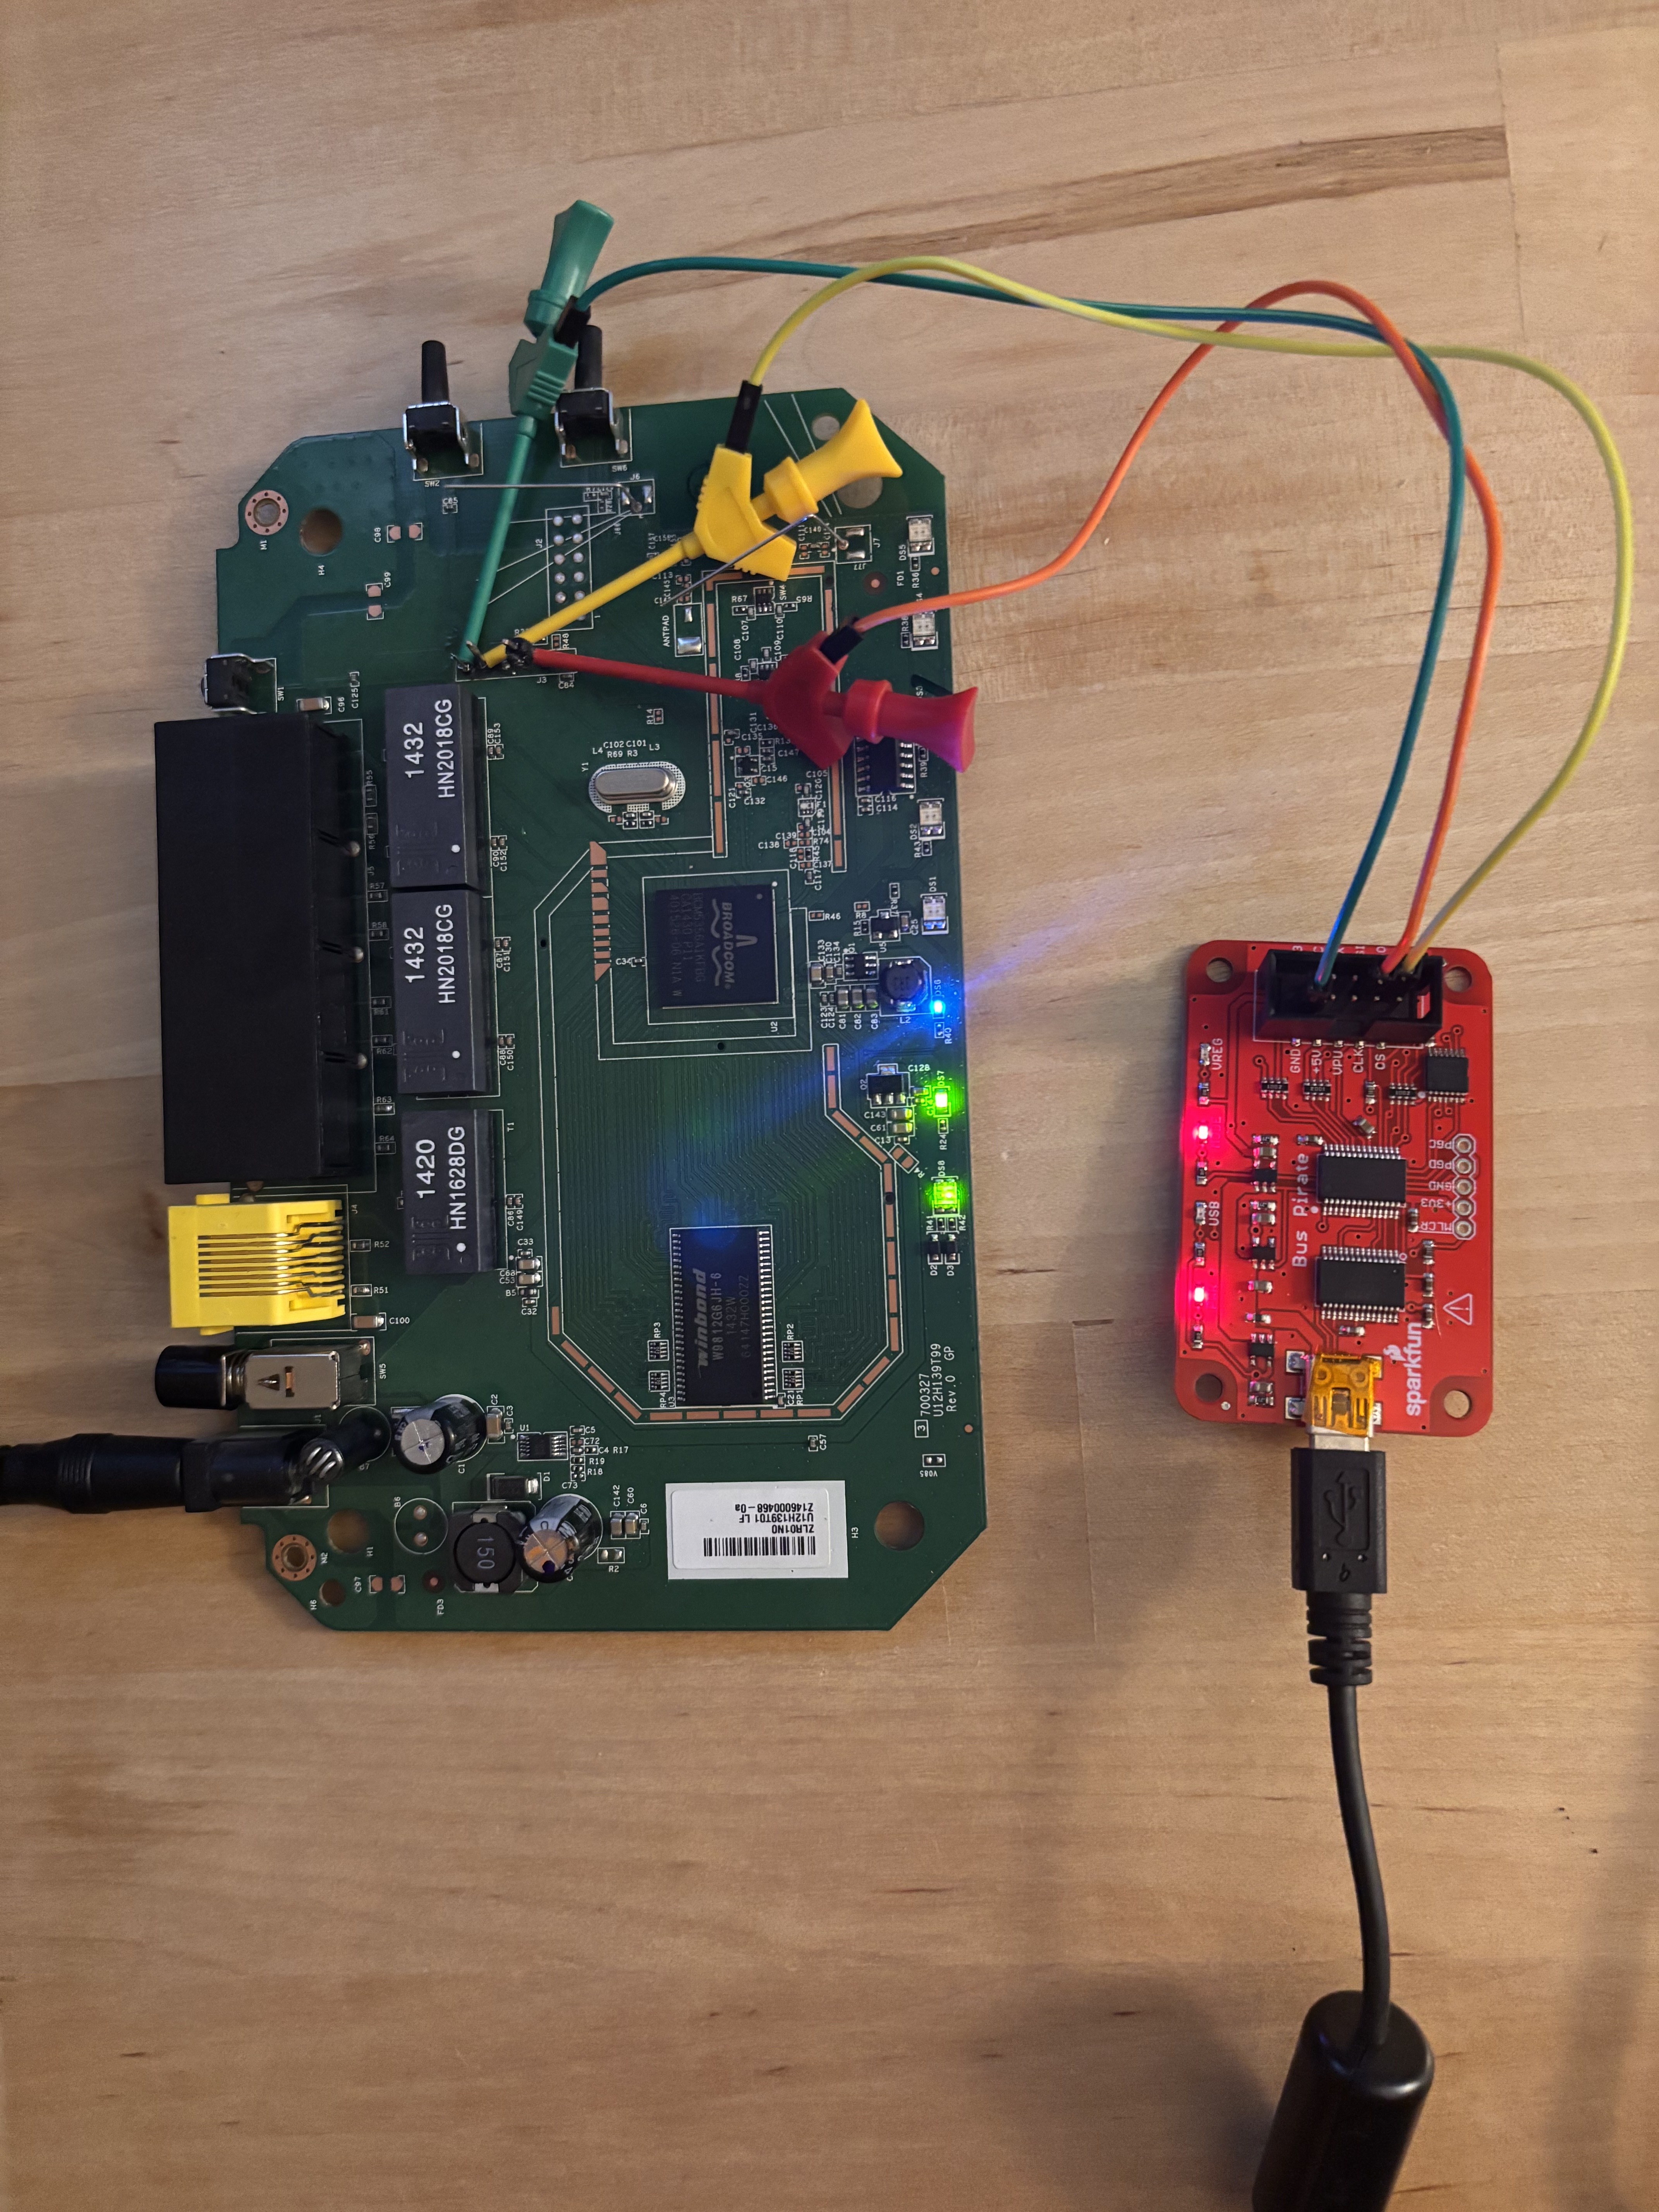
Once this is all connected it should look something like this:

Now that we have all of our connections we can now jump over to linux.
To start our connection to our BusPirate, we will type:
sudo screen /dev/ttyUSB0 115200
You should be presented with the HiZ or (high impedence mode)
HiZ>
We can now now type ‘w’ to get the list of menu options:
HiZ>m
1. HiZ
2. 1-WIRE
3. UART
4. I2C
5. SPI
6. 2WIRE
7. 3WIRE
8. LCD
9. DIO
x. exit(without change)
we are going to type ‘3’ for UART
(1)>3
Set serial port speed: (bps)
1. 300
2. 1200
3. 2400
4. 4800
5. 9600
6. 19200
7. 38400
8. 57600
9. 115200
10. BRG raw value
We are going to choose ‘9’ for 115200 bps
(1)>9
Data bits and parity:
1. 8, NONE *default
2. 8, EVEN
3. 8, ODD
4. 9, NONE
(1)>
‘1’ for default
(1)>1
Stop bits:
1. 1 *default
2. 2
(1)>
‘1’ for default
(1)>1
Receive polarity:
1. Idle 1 *default
2. Idle 0
(1)>
‘1’ for default
(1)>1
Select output type:
1. Open drain (H=Hi-Z, L=GND)
2. Normal (H=3.3V, L=GND)
‘2’ for normal
We should now be presented with the following:
(1)>2
Ready
UART>
For the UART menu, you can type:
UART>(0)
0.Macro menu
1.Transparent bridge
2. Live monitor
3.Bridge with flow control
We are going to choose option 3 and select y for yes
UART>(3)
UART bridge
Reset to exit
Are you sure? y
And…..
BusyBox v0.60.0 (2014.02.27-07:07+0000) Built-in shell (msh)
Enter 'help' for a list of built-in commands.

#
# ls
www
var
usr
tmp
sys
sbin
proc
mnt
media
lib
etc
dev
bin
We get a shell!
References:
- https://techinfodepot.shoutwiki.com/wiki/Netgear_WNR1000v3
- https://openwrt.org/toh/netgear/wnr1000_v3
- https://learn.sparkfun.com/tutorials/bus-pirate-v36a-hookup-guide/all


